Magick Tricks

Examples
Here’s a gallery of images showing the different effects:
Preface
Whilst putting together this site I created several filler pages with copy-pasted screenshots, unthoughtful titles and Lorem Ipsum body text, so I could get everything laid and working properly before splurging content out.
Instinctively I grabbed some images from my favourite vendors to kick things off - OPNsense, TrueNAS, Nextcloud and I think Proxmox. After grabbing two or three stock images, screenshots, logos and whatnot I set about laying out my blog page in a card view. Although it wasn’t a thoughtful exercise, this ingredient list isn’t too far from what you’ll likely find on this page. However, after configuring my three-card slice and passing my image props through using Astro’s Image optimisation component I couldn’t help but notice one of the cards:
An image I’d rather casually saved as and plonked onto a post as a cover image looked really good. In fact, it looked nice enough to make all of the other screenshots and quasi-brand assets look pretty ordinary. I studied the image for a bit and decided to see if I could create something similar to tart up the rest of the content. After wasting an hour rather haplessly using GIMP, instead of throwing in the towel I thought I’d double down. Toiling with graphics software shouldn’t represent any sort of obstacle to rants and raves, so I decided to create a shell script that could automate the process of building slick blog covers from ordinary screenshots without evening glancing at the splash screen of a graphics suite.
So… after emerging from a very deep rabbithole, Magick Tricks came about. (Magick Tricks)[https://github.com/sigreer/magick-tricks] is an unnecessarily overbaked shell script that uses ImageMagick to generate a screenshot cover image from the command line using just three ordinary screenshots as input arguments.
Below this section are some examples followed by some descriptions from the README.md page created for the Github repo. So, if you spot these cover images across my site over the coming weeks and months, then I guess it passed the ‘hopelessly easy to use’ test!
Examples
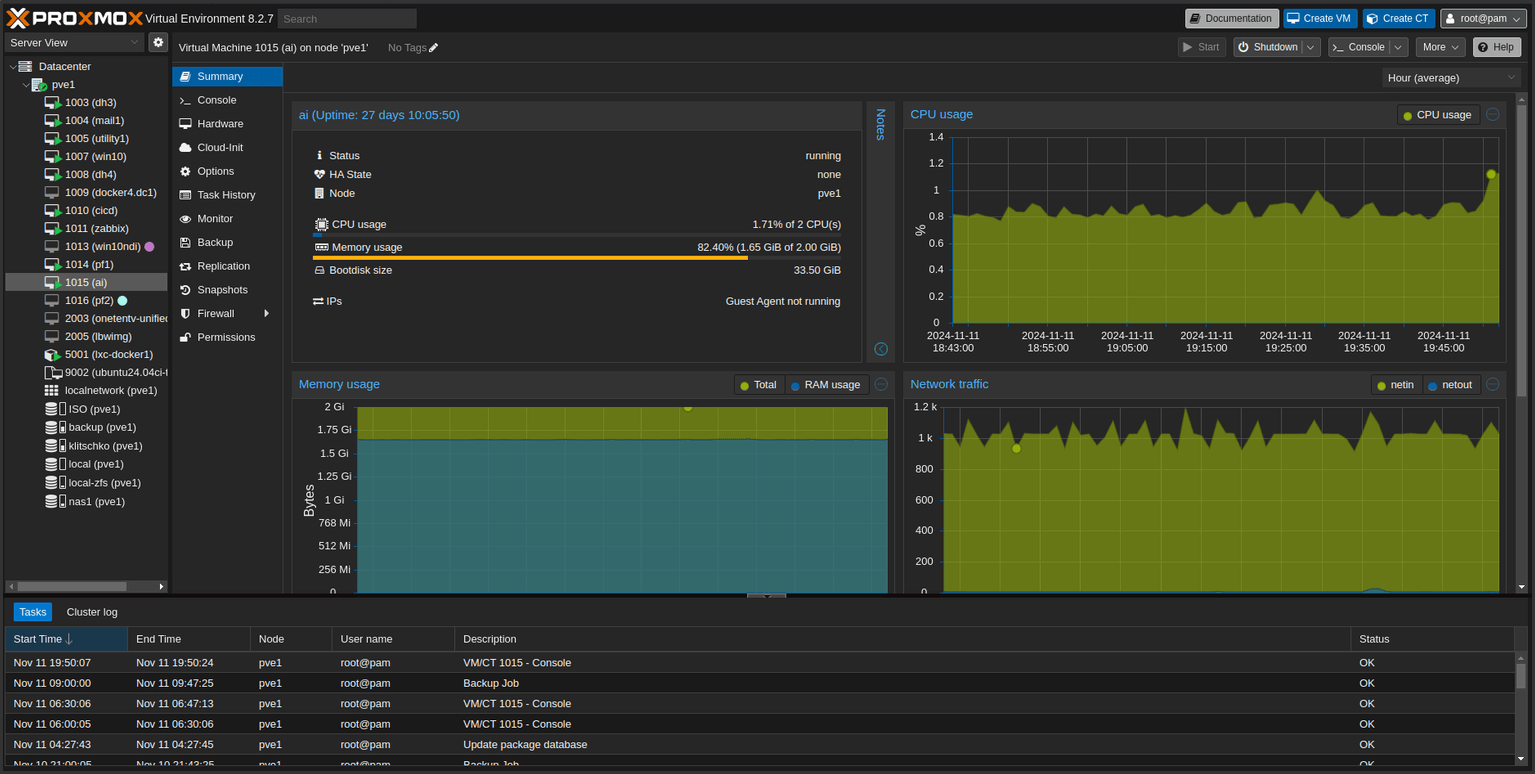
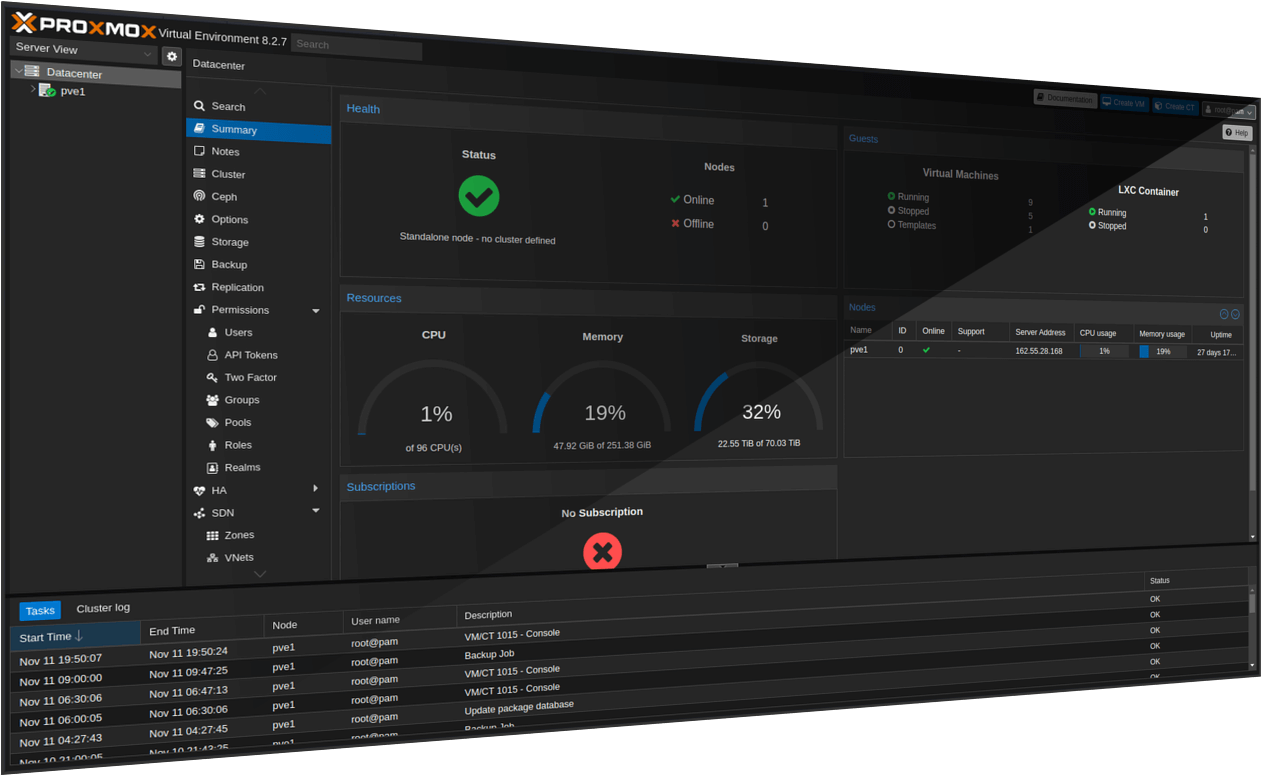
Source images
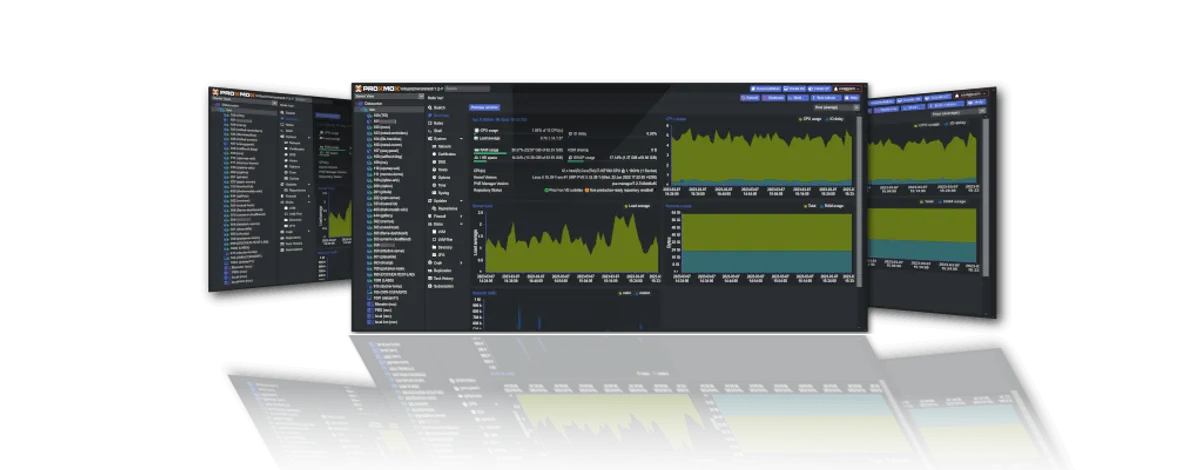
Horizontal Perspective Effect
Test text after gallery
Elements of the Effect
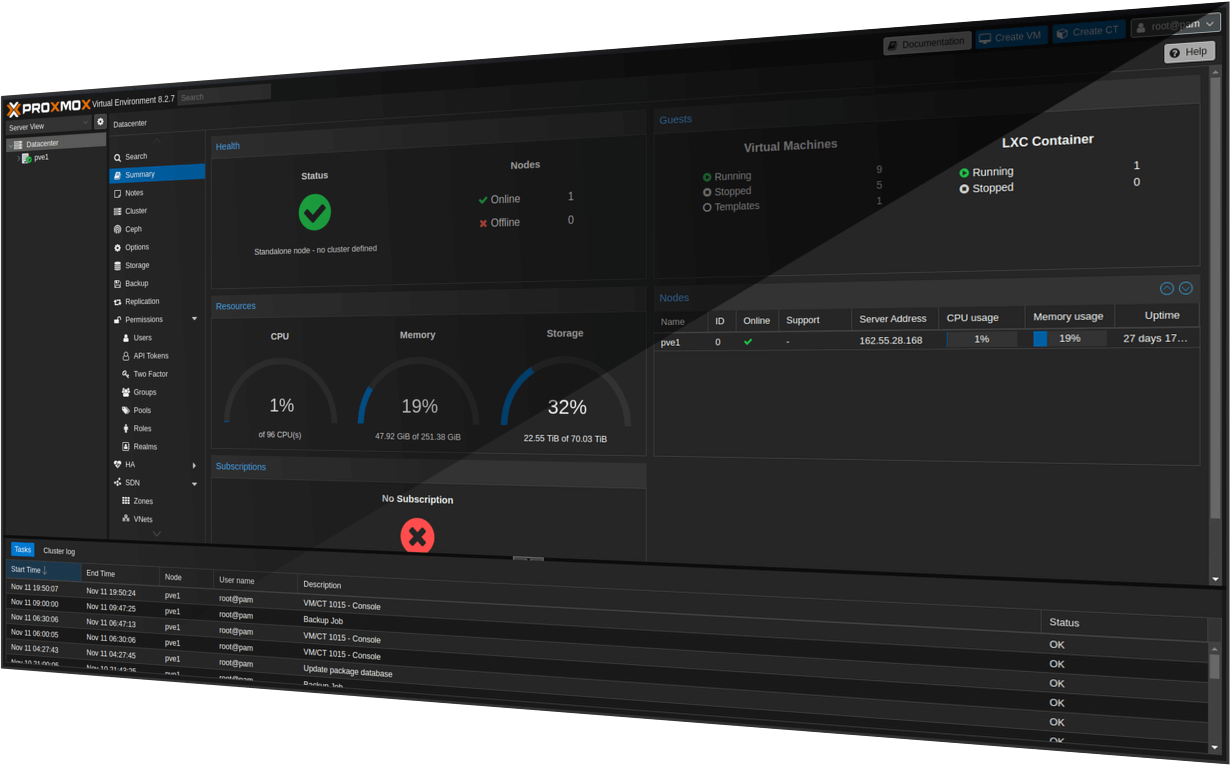
- Flat with shadow effect applied
- Single panel titles
- Merged tilted panels
Info & Usage (from GH)
Features
- Works with three images - centre, left and right.
- Horizontal vanishing point perpsective preset
- Vertical mirror tilt preset
- Generates two variants of each effect (inward and outward facing side images)
- Customizable cover shadow effects with 3 presets (3 looks the slickest)
- Adjustable background colours and opacity
- Compact, standard or wide layout (wide is default as the others don’t cut the mustard yet)
- Preserves image quality with automatic height normalization
Usage
./tricks.sh <perspective|mirrortilt> image1 image2 image3 [options]Subcommands
perspective: Creates a collage with a central vanishing point effectmirrortilt: Creates a collage with mirrored tilt effects
Options
--compact: Overlap the background images for a more compact layout--wide: Add spacing between images (default)--cover-shadow=N: Use cover shadow preset (1, 2, or 3), defaults to 1--cover-shadow-opacity=N: Set shadow opacity (0-1 or 0-100%), defaults to 70%--background-color=HEX: Set background color (defaults to #000000)--background-opacity=N: Set background opacity (0-1 or 0-100%), defaults to 0--no-cleanup: Keep temporary files for debugging--output-dir=PATH: Specify output directory (defaults to current directory)
Example Commands
Check the GitHub repo for the outputs to each of these commands.
./tricks.sh perspective input_1.png input_2.png input_3.png --cover-shadow=1./tricks.sh mirrortilt input_1.png input_2.png input_3.png --cover-shadow=2 --compact./tricks.sh \
perspective \
input_1.png input_2.png input_3.png \
--background-color=#2a2a2a \
--background-opacity=0.8 \
--wide \
--cover-shadow=3 \
--cover-shadow-opacity=50% \
--no-cleanup \
--output-dir="./output-images"